Wednesday, August 5, 2020

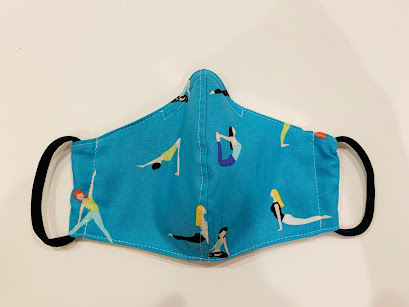
POCKET FACE MASK SEWING PATTERN AND TUTORIAL

Pin It Now!

๐Ÿ’™๐Ÿ˜ท๐Ÿ’™

A free sewing pattern and tutorial for personal and donation use only (not for resale). 

Includes three sizes (WOMENS, MENS AND SMALL CHILD).

NOTE: I use a serger to sew this pattern, but it is not necessary. You may use a sewing machine to sew the entire face mask. If you do sew with only a sewing machine, I recommend adding 1/4” to only the ends of both the outer and lining pieces (where the elastic will go through). This way you can double fold and sew that edge to hide the raw edge.

Start by downloading my FREE face mask pattern HERE

MATERIALS:

·         Outside of Mask: Cotton Fabric Print of choice

·         Lining of Mask: Cotton Fabric solid or print of choice

·         Straps: 2 – 1”x9” rectangles of stretch cotton jersey knit fabric

·         Nose Wire: 1 standard paper clip


SEAM ALLOWANCE: Use 1/4” seam allowance unless otherwise noted.


Step 1: Cut the pattern. Pin the paper pattern to the fabric. Lay fabric right sides together so you can cut both pieces at the same time. Plus, if they are already arranged right sides together, they are ready to sew๐Ÿ˜. 


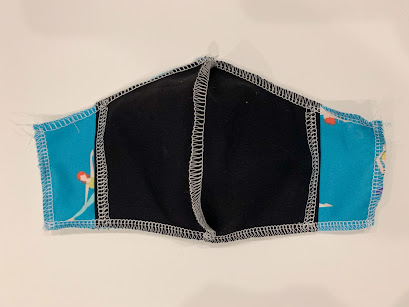
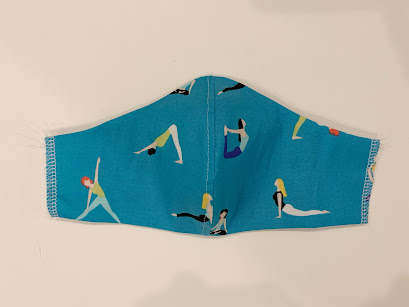
Step 2: Sew the OUTER pieces together. Sew or serge the big curved side (nose to chin). Serge the raw edges of each of the ear sides. (Or if using a sewing machine, you should have added 1/4” to the ear edge. Fold once and press). Press the center seam to the left, press and top stitch. This part is optional, but I find it helps with feeding the nose wire in later. 


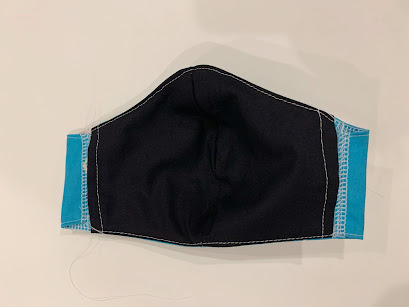
Step 3: Sew the LINER pieces together. Sew or serge the big curved side (nose to chin). Serge the raw edges of each of the ear sides, just like you did for the outer piece. Here is where it’s different – fold ear side edges once and topstitch in place. (or if only using the sewing machine, you should have added 1/4" to the ear side. Fold TWICE, press and then topstitch).


Step 4: Sew the outer and lining pieces together. Place outer and liner pieces right sides together. Match your center seams at the nose and the chin. Pin along top and bottom as needed. Serge or sew both the top and bottom of mask. Tip: when sewing the top I like to start at the center seam and sew to ear edge, then switch and sew the other side center seam to other ear edge. This part of the fabric is on the bias and so it can get shifty and misbehave. Sewing from the center and out helps with that. Repeat for bottom chin side of mask.


Step 5: Turn right side out and PRESS. Open your seams up as much as possible. Remember to iron the center seam while you’re at it.


Step 6: Topstitch the top and bottom of mask. Topstitch 1mm away from the edge along the entire top nose edge as well as the bottom chin edge.


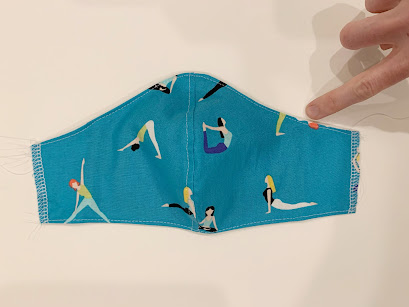
Step 7: Make the elastic casings. Fold the outer ear edge in so it is flush with the lining edge. Topstitch in place.


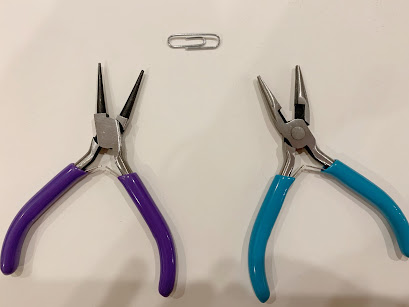
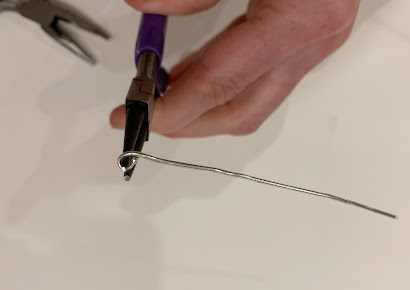
Step 8: Adding the nose wire. Prep the nose wire by straightening a standard paperclip. I used flat nose pliers and round nose pliers for this part. Bend both ends of the paper clip to ensure the don’t poke through your fabric later. Use the straightened paper clip to center along the nose side. Add 1/8” to the length to ensure you have some wiggle room. Use pins to mark the length. Sew the left side about 1/4” down and then pivot the needle to sew the long edge. Leave the right side open. Feed the wire in between the layers then close the right-side wire opening closed. Bend the wire at the nose seam and adjust as needed.


Step 9: Add elastic ear straps. I prefer to use cotton stretch jersey knit fabric for the ear straps. Cut two straps 1” x 9”. Use a safety pin to thread a strap through each side of the mask. Pull the straps to pre-stretch them. This will curl the straps. Tie a square knot (right over left, left over right). The ear strap loop should be about the size of a standard hair band. Pull tight so the knot gets small enough to feed through the casing. Trim the elastic tails off and slide the knot inside the casing.


 YAY! Great job! Your mask is finished! 


๐Ÿ’œ๐Ÿ˜ทHappy Sewing!๐Ÿ˜ท๐Ÿ’œ

Thursday, March 6, 2014

Rachel's Wedding Dress

Pin It Now!

 This is the wedding dress I made for an amazing gal named Rachel. Rachel was absolutely fantastic to work with... such a beautiful and classy young lady on the inside and out. I honestly loved every minute of making this dress!

 
I used ivory dupioni silk for the main dress with layers of English netting overlaying the skirt. 


  I also made the bridesmaid dresses below. Rachel was so nice to let the girls choose their own dress style, so each of them is unique. I think her color choice of blush and ivory are stunning and timeless... definitely something she can look back on 20 years from now and relish in her wise decision :) 

Congratulations, Rachel!

Tuesday, December 24, 2013

Merry Christmas!

Pin It Now!

It's been a wonderful year! I started homeschooling my kids, which I'm loving very much. I am still sewing when I can find the time, but there is a time and a season for everything, and now I need to focus on growing young minds :) Although, I did finish sewing a custom silk wedding gown that I am eager to share with you soon!

Tuesday, May 21, 2013

Guipure Lace Wedding Dress

Pin It Now!
I sewed this dress for my dear friend Linda. Doesn't she look amazing!? I lost count of the number of hours I spent on this dress, but I truly loved making it. This particular lace is a guipure lace, which is heavily embroidered motifs. In order to piece the lace together, it is essential to drape the lace on a dress form and hand-sew in together. Yes, entirely hand-sewn.... carefully cutting around each motif and overlaying over the next piece to blend the lace without seams. It was a labor of love indeed, but well worth it in the end.


I love my dress form :)
 I did a simple silk sash and did some simple hand beading to accent it.
Check out those silk covered buttons. So classy :)

I'm working on another wedding dress now that has a alenรงon lace top and a English netting bottom. To die for... that wedding isn't until July, so stay tuned!

Tuesday, January 8, 2013

Winner of the 2013 Woodland Calendar Giveaway!

Pin It Now!

Comment #10 Bart-Eve Smith

Congratulations! Please email me with your shipping address and I will put your mini-calendar in the mail, as well as email the printable pdf calendar files :)


 But wait; there's more! Everyone else who commented will receive the pdf calendar files! Surprise!!!

Rachael *emailed
Janelle *please send me your email address
Heather *emailed
Chandra *emailed
Jessica *emailed
Missy *please send me your email address
Maria *please send me your email address
Rachel *please send me your email address
Marla *please send me your email address

♥ Thanks for participating! ♥

Tuesday, January 1, 2013

Calendar Giveaway and Modest Maven Coupon

Pin It Now!
 (Ended) 2013 Calendar Giveaway
I created a cute new wall calendar to welcome the year 2013! It's a woodland theme featuring twelve adorable woodland animals, hand drawn and then digitally recreated by yours truly. You can visit my shop to purchase the printable pdf version of both the write-in and mini versions of my calendar for only $6.99. I'm a write-in gal myself, and would be loopy without being able to schedule everything on my wall calendar.


I am not offering the printed copies in my shop, however, for this giveaway, the winner will receive a printed mini calendar, as well as the pdf files for both the write-in and mini versions of the calendar.

Calendars make fabulous new year's gifts and with the printable calendars, you'll be able to print as many as you like to give away.


Two possible entries per person:
  1. Comment on this blog post.
  2. Visit my shop, www.modestmaven.etsy.com, and "pin" your favorite item to Pinterest. Return to this blog post to comment.

Terms of the Giveaway:

  The giveaway ends on Tuesday, January 8th, 2012 at 12pm central time. The winner will be randomly selected and results posted the same day. 
  No purchase is necessary.
  Odds of winning are based on number of entries.
  Two entries allowed per person. One for commenting on this blog post and second for "pinning" your favorite item from my etsy shop, then returning and posting on this blog post.
  Prize value is $15, and includes world-wide first class shipping of the mini-calendar and email of pdf calendar.
  Ages 18 and older are eligible to enter.


Coupon Code:
 Shop at Modest Maven and enter  NEWYEAR13  at checkout to receive 13% off your entire order! Includes full-priced and sale items. Valid through January 8, 2013.


 Happy New Year!